
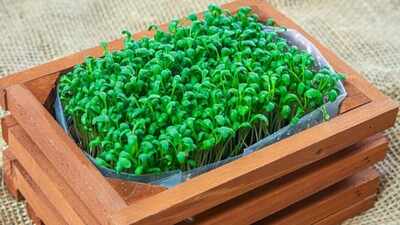
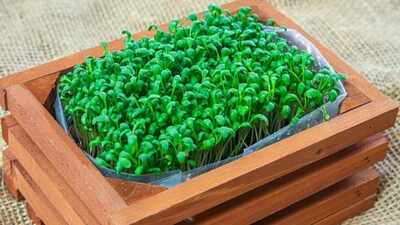
You don’t need a backyard, a farmhouse, or even a proper garden to grow something worth eating. Micro gardening is exactly what it sounds like: cultivating herbs, greens, and even small vegetables in whatever compact space you actually have- a windowsill, a narrow balcony, a corner of a kitchen counter. It’s become the natural answer for anyone living in an apartment who still wants the satisfaction of snipping fresh basil for dinner or watching a tomato actually ripen on its own vine. The good news is that getting started needs far less equipment and expertise than most people assume. Here’s a step-by-step walk-through for anyone starting from absolute zero.
Assess your space before you buy anything
Before picking a single plant, spend a few days actually watching your space. Note how many hours of direct sunlight it gets, and whether that light is full sun, a few hours of partial sun, or mostly filtered shade, since this single factor will decide almost everything else you plant later. If you’re working with a balcony, check your building’s rules around weight limits and pot types before going further, and take note of how exposed the space is to wind, since strong gusts can dry out containers fast or even tip over lighter pots. Finally, work out how easily you can actually get water to the space, since that convenience matters more than people expect once the routine sets in.
Choose containers that actually suit a balcony
Regular garden pots aren’t always the best fit for a small, elevated space. Lightweight options like plastic, resin, or fabric grow bags tend to work better on balconies than heavy clay, and fabric bags specifically offer a genuine advantage: they let roots air-prune at the fabric’s edge, which encourages a denser, healthier root system than a solid-walled pot allows. Whatever you choose, drainage holes are non-negotiable, and size matters more than people think, herbs generally do fine in pots six to eight inches deep, while leafy greens prefer something a little roomier, around eight to ten inches.
Get the soil right
This is where a lot of beginners quietly go wrong. Regular garden soil is too dense and heavy for a container that a plant will live in for its entire life, compacting over time and draining poorly. A light, fluffy, well-draining potting mix is what you actually want, one that holds enough moisture to keep roots hydrated without ever staying soggy. Mixing in some compost adds a genuine nutrient boost right from the start, giving young plants a stronger foundation than potting mix alone would provide.
Match your plants to your light
This step turns your earlier observation about sunlight into an actual shopping list. If your space gets full, direct sun for much of the day, cherry tomatoes, beans, peppers, strawberries, and herbs like basil and rosemary will genuinely thrive. Spaces with more moderate, partial sun suit lettuce, spinach, kale, radishes, cilantro, and mint far better. For corners that stay mostly shaded, your options narrow, but certain lettuce and spinach varieties, along with ornamental ferns, can still make something of a low-light spot. Picking plants that match the light you actually have, rather than the light you wish you had, saves an enormous amount of frustration later.
Think vertically from day one
Floor and railing space runs out fast in a small setup, which is exactly why thinking upward rather than outward changes everything. Hanging baskets work well for trailing plants like cherry tomatoes or strawberries, a simple trellis lets climbing vegetables like cucumbers grow up instead of out, and railing-mounted box planters turn an otherwise unused balcony edge into genuine growing space. Wall-mounted shelves or a tiered plant stand in a corner add even more room without touching the floor at all, letting a small space hold noticeably more than it first appears capable of.
Build a simple watering and feeding routine
Container plants dry out considerably faster than anything grown in open ground, so a consistent watering habit matters more here than in a traditional garden. Self-watering planters are a genuinely useful safety net for beginners, giving you a buffer of a day or two if life gets in the way of a regular schedule. For feeding, a simple compost tea, compost steeped in water overnight and then strained, makes an inexpensive, effective liquid fertilizer that reintroduces beneficial microorganisms your container’s enclosed soil can’t naturally replenish on its own.
Start small and expand
The honest beginner toolkit is smaller than most guides make it sound, a hand trowel, a watering can, and a pair of pruners cover almost everything you need for the first season. Rather than filling every available inch on day one, starting with a single container and a single plant lets you actually learn how much light, water, and attention your specific space provides before committing further. Once that first pot is thriving, expanding a shelf or a railing planter at a time feels like a natural next step rather than an overwhelming project.
Disclaimer:
This article is intended for general informational purposes only. Growing conditions, plant availability, and results can vary depending on your specific climate, space, and local growing season. For advice tailored to your exact conditions, consult a local nursery or gardening expert.