
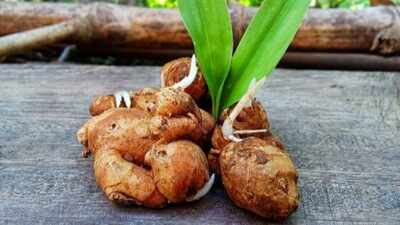
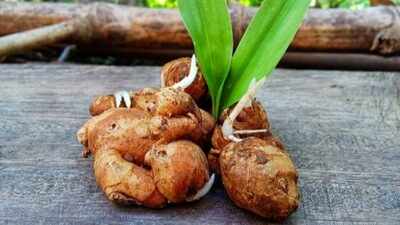
There’s something quietly satisfying about turning a piece of ginger that’s been sitting in your kitchen drawer into an actual, living plant. The good news is you really don’t need a garden, a green thumb, or any special equipment to pull it off. Ginger is one of the easier kitchen scraps to regrow successfully, provided you get a few basic details right: choosing the correct piece, giving it the right soil and light, and mostly just being patient while it takes its time to sprout. Here’s a complete beginner’s step-by-step guide for turning a humble piece of ginger into a plant that can keep supplying your kitchen for months.
Choose the right piece of ginger
Your success starts right here, before any soil is even involved. Look for a piece that’s firm and plump with smooth, unwrinkled skin. Check closely for small raised bumps on the surface; these are the “eyes” or buds from where the new growth will sprout. They are very similar to the eyes you’d spot on a potato. Avoid anything shrivelled, soft to the touch, or showing any hint of mould. If you can, go for organic ginger specifically, since commercially grown ginger sold in regular supermarkets is sometimes treated with growth inhibitors to stop it sprouting on the shelf, which obviously works against you here.
Soak it overnight to wake it up
This step is optional, but it genuinely helps, especially if your ginger piece has been sitting around for a while. Submerge it in a bowl of warm water and let it soak overnight, which rehydrates the rhizome and gives the buds a gentle nudge to start swelling and waking up before you even get it into soil. It’s a simple, five-minute step the night before that can noticeably improve your odds of a healthy sprout, particularly with store-bought ginger that’s already travelled some distance and dried out a little along the way.
Cut it into pieces and let them cure
If your ginger piece is on the larger side, cut it into smaller sections roughly 2.5 to 5 cm long, making sure each piece has at least one or two visible eyes intact. Once cut, resist the urge to plant immediately; instead, leave the pieces in a warm, dry spot for a day or two, spaced apart so they’re not touching. This allows the cut surfaces to form a protective callus, which is the single biggest factor in preventing the piece from simply rotting in the soil before it sprouts.
Prepare a wide, shallow pot with the right soil
Ginger rhizomes grow and spread horizontally rather than digging deep, so a wide, shallow container will always serve you better than a tall, narrow one. Fill it with a loose, well-draining mix; a combination of regular potting soil, compost, and either perlite or coarse sand works well, since ginger genuinely dislikes sitting in soggy, compacted soil. Make sure whatever pot you choose has proper drainage holes at the bottom, as poor drainage is one of the most common reasons home-grown ginger fails before it ever gets going.
Plant it with the eyes facing up
Place your cured ginger pieces on the soil with the eyes or buds pointing upward toward the surface, then cover them with roughly 5 cm of soil, gently pressing down without compacting it too firmly. If you’re planting more than one piece in the same container, leave at least 15 to 20 cm of space between each one, since they’ll need room to spread out as they establish. Water gently but thoroughly right after planting to settle the soil around the piece.
Give it warmth and filtered light, not harsh sun
Ginger naturally grows in the dappled shade of a forest understory, not in blazing open sunlight, so a spot with bright but filtered or partial light suits it far better than a harsh, south-facing windowsill. Too much direct, intense sun, particularly in the afternoon, can scorch the leaves once the plant is actively growing. A warm spot indoors, or a shaded corner of a balcony that avoids the harshest midday sun, tends to work well for most home growers.
Be patient, and water consistently once it sprouts
This step tests beginners’ patience the most. It can take anywhere from a few weeks to 50 days or more before you see any visible growth, and during that early dormant stretch, the rhizome doesn’t need much water or light to begin sprouting underground. Once green shoots do appear, water regularly enough to keep the soil lightly moist at all times, never letting it dry out completely, but also never letting it stay waterlogged, which is the fastest way to rot the rhizome.
Harvest gradually, and keep the cycle going
The good news is you don’t have to wait for one big harvest day. Once the plant is established, you can gently dig around the base and snap off a small piece whenever you need fresh ginger for cooking, without disturbing the rest of the plant. A full, mature harvest typically takes around 8 to 10 months, but partial harvesting along the way means you’re never really waiting that long to start using what you’ve grown. Save a healthy chunk of whatever you harvest to replant immediately, and you can keep this cycle going indefinitely.Disclaimer: This article is intended for general informational purposes only. Growing conditions, sprouting time, and harvest results can vary depending on your specific climate, ginger variety, and growing setup. It’s advisable to consult a local nursery or horticulture expert for guidance tailored to your region, particularly in areas with colder winters where ginger may need to be grown indoors or moved seasonally.